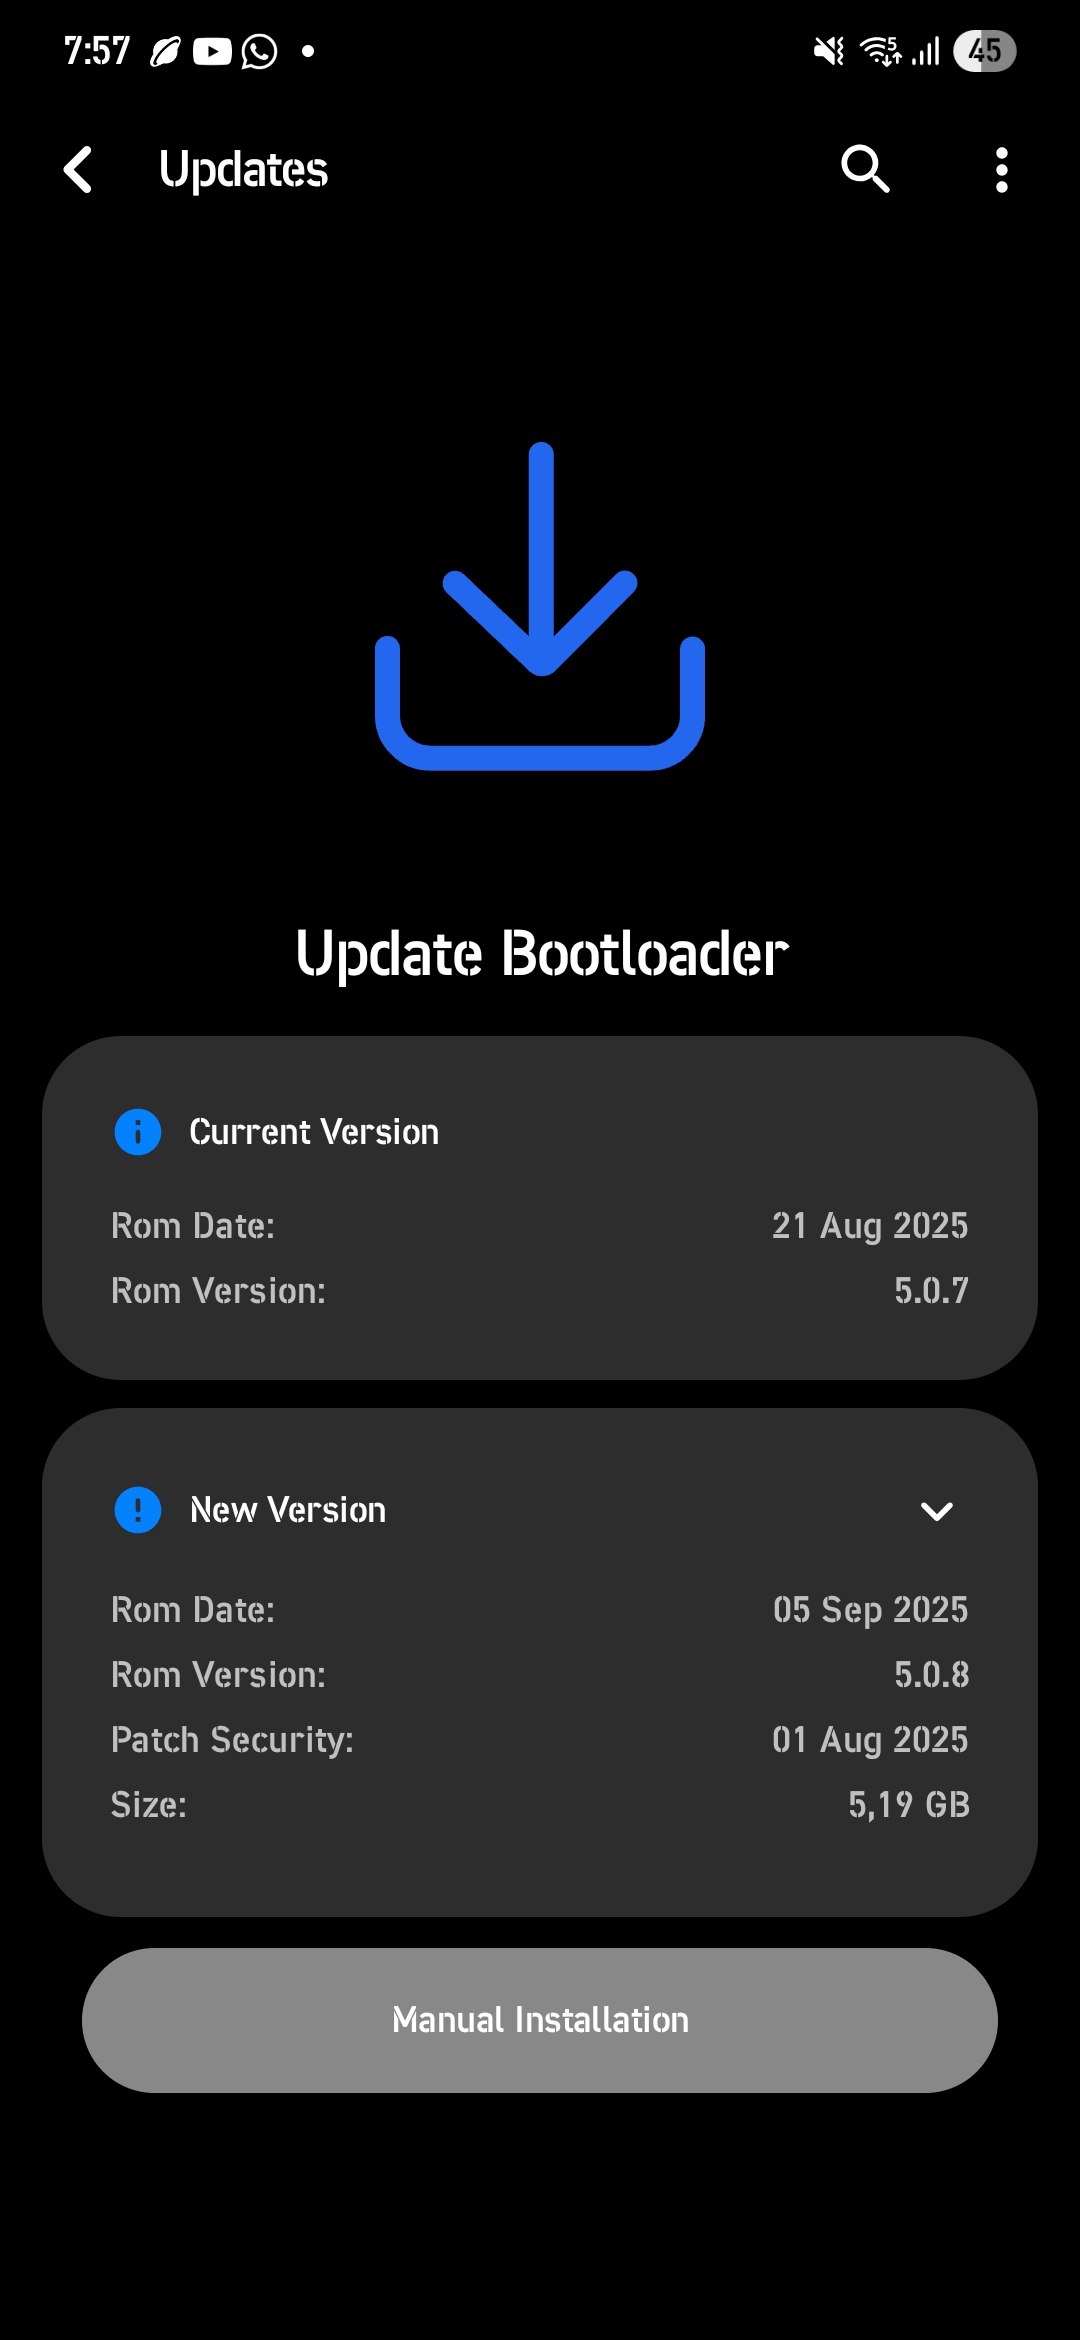
• Download firmware stock required for LichUI (view Add-ons page), and extract
• Download and extract Odin
• Download and install Samsung Driver
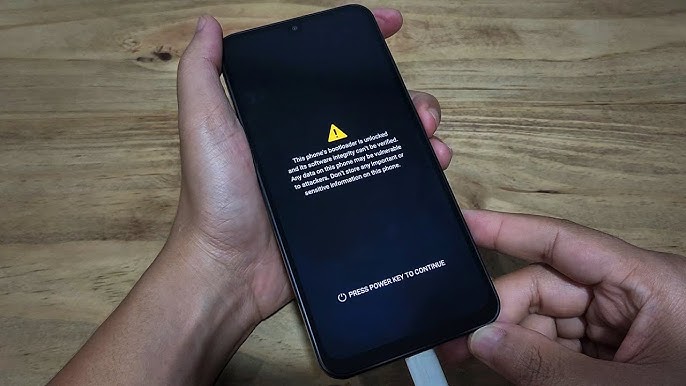
• Reboot your device into bootloader mode
• Connect your device to your PC via USB
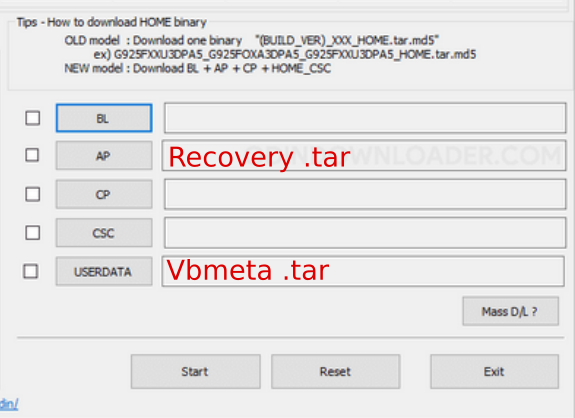
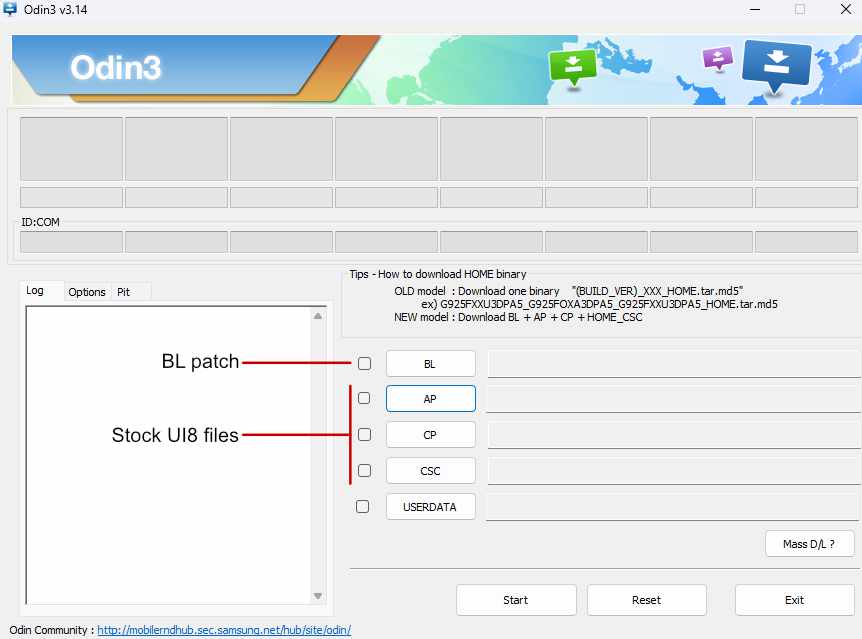
• Open Odin and select firmware sctock files; Bl, AP, CP, CSC
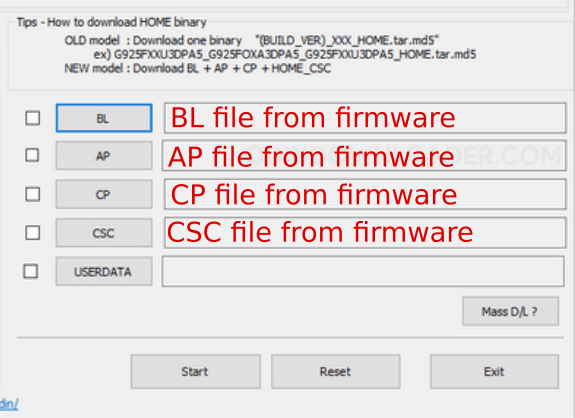
• Click on Start and wait for the process to finish
• Odin finishes autoreboot and skip initial setup
• Connect your device to internet
• Activate developer options
• Enable OEM unlocking and USB debugging
• Continue with recovery installation